How To Avoid Large Scale Product Quality Issues?

How To Avoid Large Scale Product Quality Issues?

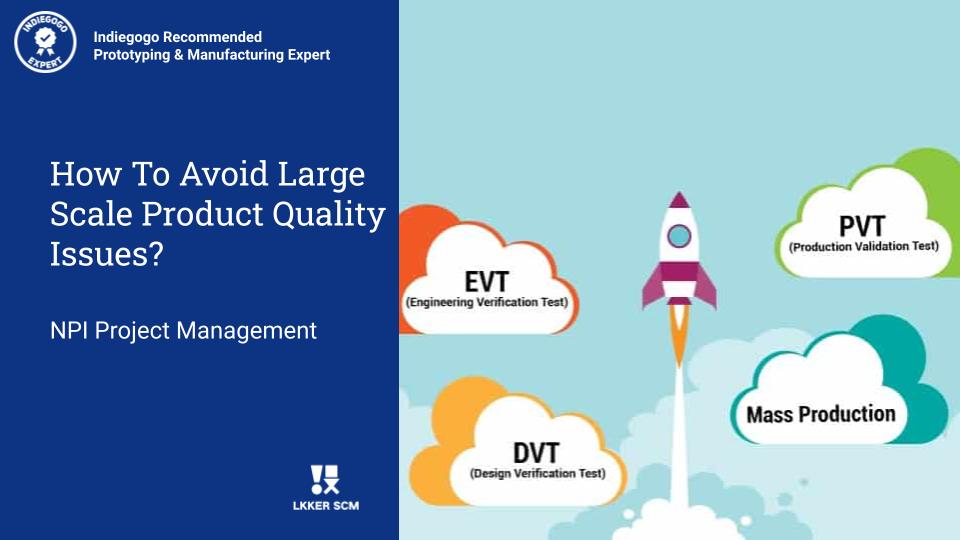
There are three different validation tests that a product needs to perform before it goes into mass production: Engineering Validation Test (EVT), Design Validation Test (DVT), and Production Validation Test (PVT). Investing in the EVT, DVT, and PVT process can largely help avoid large-scale product quality issues.

Many companies simply assume that once they have a working prototype / MVP (Minimum Viable Product) and a sufficiently comprehensive Product Requirements Document (PRD), they can go straight to mass production.

However, without proper verification procedures, your product could be recalled in the future, which could cost your company as much as $10 million to over $100 million.

There are three different validation tests that a product needs to perform before it goes into mass production:

1. Engineering Validation Test (EVT),
2. Design Validation Test (DVT),
3. Production Validation Test (PVT).

EVT (Engineering Validation Test) 

Number of EVT (Engineering Validation Test): 10-50
Duration of EVT (Engineering Validation Test): 4-6 weeks
Purposes of EVT (Engineering Validation Test): Validate all features and functions are operational.

Many products have just been designed as engineering prototypes, and it is necessary to correct possible design problems one by one, focusing on considering the design integrity and whether any specifications are missing, including functional and safety tests.

EVT (Engineering Validation Test) checks that your product meets all functional, performance, and reliability requirements listed in the PRD (eg 4 hours of battery life, 15Hz – 25kHz frequency response).

The main purpose of EVT (Engineering Validation Test) is to obtain a product sample that meets all expected results and specifications.

DVT (Design Validation Test)

Number of DVT (Design Validation Test): 50-100 units
DVT (Design Validation Test) Duration: 4 weeks
Purposes of DVT (Design Validation Test): Correct the problematic design

In DVT, all designs are complete and the focus is on identifying design issues and making sure all designs are within specification. Verified by R&D and DQA (Design Quality Assurance), the product is basically finalized at this time.

This stage is closely related to the regulatory certification (e.g. RoHS, FCC, UL) for the sale of your product. As such, these tests focus on building the product consistently and reliably. These prototype units will undergo rigorous stress tests (eg, falls from 1.2m heights, burning, submersion in water, extensive battery testing, etc.) to check their durability, stability, and product longevity. User groups can also be used to test whether a product meets customer expectations.

PVT (Production Validation Test)

Number of PVT (Production Validation Test): 1000 Pieces
PVT (Production Validation Test) Duration: 2 weeks – 2 months
Purposes of PVT (Production Validation Test): Reach mass production efficiency 

At this stage, all product designs have been completed, and the final step is to verify before mass production to ensure that the factory has the means to make the originally designed products according to the standard procedures.

Before entering mass production, it is important to conduct a trial run of the production line to assess quality assurance (QA) and quality control (QC). PVT (Production Validation Test) is designed to optimize your mass production process, ensuring that the product is produced at the correct quantity, cost, and quality, thus testing the entire mass production speed.

Products produced during these test periods, if they meet all requirements, can be planned for sale to customers and will be considered part of your first production run. If a fault is found, this will be your last chance to adjust the tooling before mass production.

It takes a lot of time and effort to develop the product, therefore, investing in the EVT (Engineering Validation Test), DVT (Design Validation Test), and PVT (Production Validation Test) processes can largely help avoid large-scale product quality issues.

Learn More: 

LKKER SCM NPI Project Management Service 

LKKER SCM Turnkey Design Service 

About LKKER SCM

Relevant Blogs: 

Six stages of IoT (Internet of Things) product development
The Workflow of EVT, DVT and PVT

Introduction To NPI (New Product Introduction)

Six stages of IoT (Internet of Things) product development
Six stages of IoT (Internet of Things) product development
Concept At this stage, it’s all about a great idea. POC: Proof of Concept If it is a new product, it is very important to verify the idea first. For the initial idea verification and testing, there are many resources available to assist. Product developers and Makers with basic technical capabilities can use off-the-shelf “development …

Concept

At this stage, it’s all about a great idea.

POC: Proof of Concept

If it is a new product, it is very important to verify the idea first. For the initial idea verification and testing, there are many resources available to assist. Product developers and Makers with basic technical capabilities can use off-the-shelf “development boards” or various methods to quickly simulate the prototype of the product.

The above-mentioned so-called development board is to combine the CPU that is currently popular in the embedded industry with related peripherals, such as infrared temperature measurement, pH value, air quality monitoring, and other sensors, and make the whole into a circuit board, so that people who want to invest in embedded system can start validating ideas faster, such as Arduino, Raspberry Pi, Intel Edison, MediaTek Linkit one, MTDuino…etc.

For initial idea verification and testing, you can also use more counseling resources to obtain free development boards, which can not only quickly verify, but also obtain various mass production oriented documents required at the SMT or PCB stage. It is quite suitable, and then the EMS factory or the foundry will assist in the manufacture and verification of the function. However, if you do not have the technical ability, you do not have to verify the idea at the beginning. If the idea is good enough, you can also hand over the prototype to the interested manufacturer.

EVT: Engineering Validation Test

The difficulty of IoT products is that software and hardware must be considered at the same time. In the engineering validation stage, the software part will start electronic engineering. The main reason is that the engineer will first put the ideas he wants to verify or the undecidable design in the assembly. The circuit board is tested. Once the feasibility of the circuit and program is verified, a circuit board will be redesigned, and the board will be washed, printed, and tested continuously. In terms of hardware, industrial design and mechanical design should be started, each component will be disassembled for design and confirmation, and a bill of materials (BOM) of electronic and mechanical components will be generated for cost calculation.

DVT: Design Validation Test

At this stage, the overall appearance is very close to the finished product! The internal parts and circuit boards are close to the size of the finished product, and the mechanism is also starting to make models and can be assembled for testing. Due to the high cost of opening the mold for the appearance part, the proofing model is used at this stage to test whether the design of the shell meets the requirements, and the internal software part must be tested many times, including software quality assurance (SQA), as well as environmental testing such as pressure and temperature, bug testing, and electronic products must also pass safety regulations.

The most important thing at this stage is to find out the overall design and manufacturing problems, to ensure that all designs meet the specifications related to software and hardware, and to confirm the possibility of subsequent mass production with the production side.

PVT: Production Validation Test

At this stage, in addition to finding a mass production manufacturer to confirm all the details, all parts and materials should be manufactured according to the confirmed process, so that not only can the production line be checked, but the production capacity can be confirmed, and the man-hours and actual working hours can also be estimated. Testing the production situation can also confirm that the factory has made the originally designed product according to the standard process, and obtain the manufacturing cost of the final product confirmation.

MP: Mass Production

At this stage, in addition to maintaining the quality of mass production and improving the yield as much as possible, packaging, shipping, and sales have also begun.

On the whole, it is a long road from concept development to mass production, and it is even more difficult for electronic products, especially for new start-up teams, which usually have only a few people, and have to face both hardware and software R&D, market development, and marketing. Testing, mass production, and even marketing, it is difficult to take into account all the details, which is why people often joke that “Hardware is Hard”.

Therefore, it is very important to make full use of various services, including supply chain vendors, incubators, accelerators, etc who can assist in the development.

Learn More:

LKKERSCM NPI Project Management

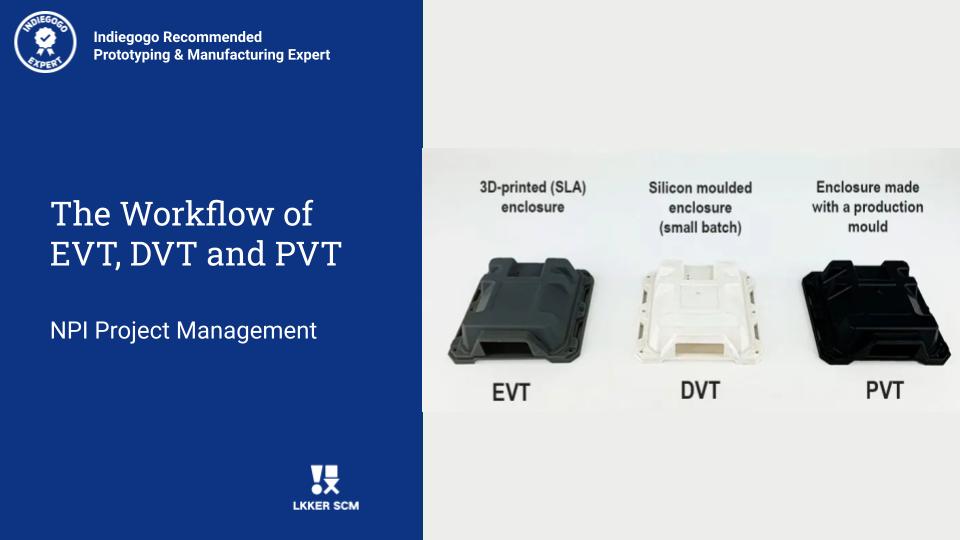
The Workflow of EVT, DVT and PVT

The Workflow of EVT, DVT and PVT

NPI (New Product Introduction) EVT Workflow 1. Participate in the Kick off Meeting to understand the background of the project, the main features of the product, and the functions implemented. 2. Participate in the establishment of the project, fully understand the name of the project, the customers of the project, the effect to be achieved …

NPI (New Product Introduction) EVT Workflow

1. Participate in the Kick off Meeting to understand the background of the project, the main features of the product, and the functions implemented.

2. Participate in the establishment of the project, fully understand the name of the project, the customers of the project, the effect to be achieved by the project, and know the development plan of the project.

3. Participate in the Review Meeting of Mechanical Design and Electronics Design, and put forward reasonable suggestions to make the product more manufacturable.

4. Participate in the Review Meeting of the mechanical prototype, participate in the review of the PCBA prototype, and participate in the selection of components to ensure the mass production of the design.

5. Participate in PCBA prototype, fully understand the layout of PCBA components, and preliminarily determine the process flow of PCBA production.

6. Organize the assembly of the production prototype, list the bug list, and propose effective improvement measures.

7. Count the functions realized and unimplemented by the prototype, participate in the prototype test, and understand the test items required by the product.

8. Participate in the project summary meeting of every validation stage, list product problem points and problem analysis, and put forward reasonable suggestions.

NPI (New Product Introduction) DVT Workflow

1. Participate in the Kick off Meeting to understand the stage of the project and whether customer requirements have changed.

2. Count the materials required in the production of the product, and make a list of materials and a checklist of materials.

3. Make the fixtures required by the product in production, make a fixture list, and a fixture Checklist.

4. Make product WI (working instruction), including PCBA testing, assembly, packaging, etc., the test WI (working instruction) needs to list the test items and test Checklist.

5. According to customer requirements, design product packaging materials, make packaging BOM and packaging Checklist

6. Organize a trial production preparation meeting to learn more about the product trial production information, confirm the solution results and treatment measures of the last problem points, and provide the relevant departments with the materials and technical support needed for the trial production.

7. Distribute product BOM, Gerber File, hardware layout file, production process file, etc to the OEM factories.

8. Confirm the test status of the product with the test engineer, make a list of test instruments and test fixtures for the product, communicate with the OEM factories to confirm that the test instruments are complete before production, and make a product test checklist.

9. Confirm the material delivery date in the production plan, and provide the OEM factory with the list of materials and the list of supplied materials.

10. Make a production notice for the product, which includes detailed product information, including the version of the product and the delivery date of the product, as well as the contact information of the person in charge, countersign and issue the production notice to the OEM factories.

11. Organize the OEM factory to hold a production preparation meeting, list the production precautions, the person in charge of each section and the production plan, etc.

12. Participate in each link of factory production, record the problem points of each link, and carry out on-site problem-solving, troubleshooting, and preliminary statistics of working hours.

13. At the end of production, conduct a trial production summary, collect factory data and count bad records, and make production reports.

14. Track the maintenance status of defective products, count maintenance results, list defective points that may occur in mass production, and make defective product maintenance reports.

15. Participate in the Review Meeting trial production summary meeting, list the production problems and the responsible departments of the problem points, as well as solutions and measures.

16. According to the problem points of the product, raise questions to the responsible department and track and record the process of solving the problem by the responsible department.

17. According to the results of production, modify and perfect the fixture.

18. Modify and optimize WI (working instruction) according to the results of production

19. Summarize the complete product production report.

20. Ongoing problem tracking.

NPI (New Product Introduction) PVT Workflow

1. Participate in Kick-off Meeting to comprehensively check whether there are unresolved problems and newly added processes in product production.

2. Hold a production preparation meeting to confirm the work preparation of each department, and at the same time propose a list of materials and checklists required for production to each department

3. Notify the quality department to issue quality inspection standards to the factory, including incoming material inspection standards, PCBA inspection standards, finished product inspection standards, etc.

4. Issue the official WI (working instruction) of each section to the factory, including SMT patch, THT plug-in, assembly, testing, packaging, etc.

5. Issue software to the factory

6. Issue production materials to the factory, including BOM, Gerber Files, hardware layout files, process documents, packaging information, etc.

7. Communicate material status and production plan with PMC to prepare for production.

8. Make mass production notices, which contain product details and key contacts.

9. Hold a production preparation meeting with the OEM factory to arrange the production plan of each section and the corresponding person in charge.

10. Track incoming materials inspection to prevent quality problems in incoming materials from affecting production.

11. Carry out production according to the production process flow specified by Flow Chart, and deal with the problems in production in time.

12. Pay attention to the quality of the production process in the production process, prevent the occurrence of substandard production methods, and assist the QC engineer to supervise and prepare the on-site quality inspection report.

13. Collect various production data, including process data, quality data, and product data.

14. Calculate the production capacity of the product according to the working hours of each production step according to the output data.

15. Analyze the reasons for the failures in production, assign them to the responsible department, and follow up on the solutions and results.

16. Pay attention to product inspection results to avoid missing points.

17. Hold a product review meeting to summarize all problems in production and submit them to relevant departments.

18. Pay attention to the feedback of products shipped to customers, and make corresponding countermeasures according to the feedback.

19. Track design problems until a thorough solution and results are obtained.

20. Analyze the yield rate of the product, especially the pass-through rate of the product, and evaluate whether it meets the mass production requirements. (Pass-through rate≥95%+)

21. Make a complete production report to conclude whether the product design has reached the level of mass production, or what needs to be done to pass the level of mass production.

22. Continuous problem tracking and improvement in the following production until mass production.

Learn More: 

LKKER SCM NPI Project Management Service 

LKKER SCM Turnkey Design Service 

About LKKER SCM

Relevant Blogs: 

How To Avoid Large Scale Product Quality Issues?

Six stages of IoT (Internet of Things) product development
Introduction To NPI (New Product Introduction)

Introduction To NPI (New Product Introduction)

Introduction To NPI

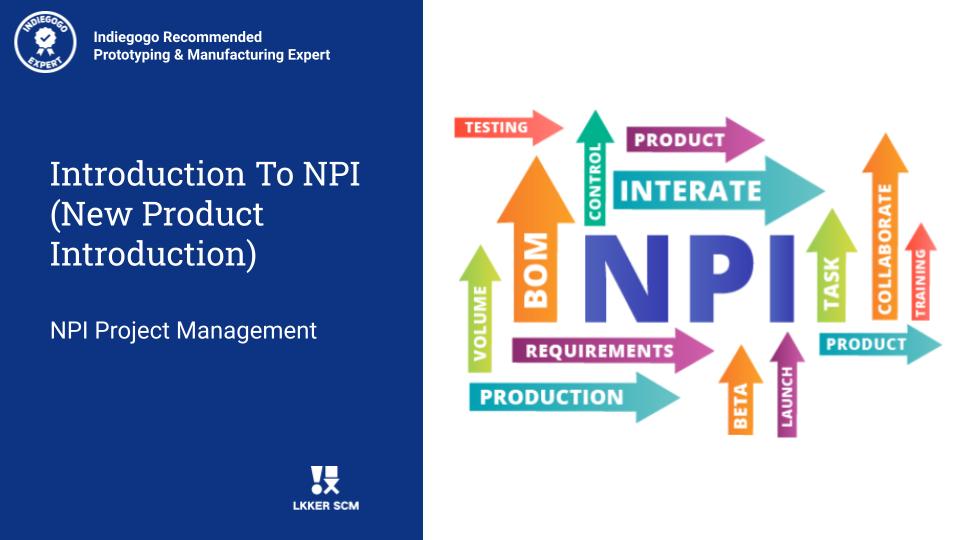
New Product Introduction (NPI) Service work with you from design stage to production to improve the product development project performance and help you launch the new product successfully to the mass production stage by EVT, DVT, and PVT.

The concept of NPI (New Product Introduction)

Differences and connections between NPI (New Product Introduction) projects and R&D projects

NPI (New Product Introduction) must be aimed at outputting products that can be delivered in batches (regardless of batch size), but R&D projects may only output design results. From a certain perspective, NPI (New Product Introduction) serves R&D projects (helps improve design, helps design validated, and helps coordinate the design and manufacturing)

The main obstacles of NPI (New Product Introduction) are frequent design changes and difficulty in obtaining initial product materials, especially since many materials are also part of the new design, but the responsibility for organizing the material often falls to the manufacturer.

NPI (New Product Introduction) requires the manufacturer to respond quickly, to have a high degree of internal and external collaboration, to have the technical ability to move forward, and to organize the business ability of external resources backward. Some companies require NPI (New Product Introduction) to have an engineering background. On the one hand, when developing and designing products with a new process, they should point out mass production difficulties in a timely manner to avoid designing products that cannot be mass-produced, and on the other hand guide manufacturing plants to improve their process capabilities.

NPI (New Product Introduction) project manager is an important position for manufacturers or supply chain companies. NPI (New Product Introduction) engineers are responsible for the success or failure of the entire process from trial production to mass production of new products. The effectiveness of work directly affects the economic benefits of the NPI (New Product Introduction) project. 

Three validation stages of NPI (New Product Introduction)

EVT: Engineering Validation Test

The design validation in the early stage of product development is generally an engineering prototype, which is used for debugging and verification by R&D engineers. Many things have just been designed, and there are still many problems so the R&D engineers keep testing feasible design solutions. All possible design problems must be corrected one by one. The R&D engineers focus on completing the design and product specification performance. Generally, R&D engineers conduct comprehensive validation of each function of the engineering prototype.

DVT: Design Validation Test

After solving the problems in the EVT (Engineering Validation Test) stage, test all signal levels and timings, and complete the safety regulations. The focus is on identifying design and manufacturing issues to ensure that all designs are within specification and ready for mass production. —Functional parameters meet requirements and design for manufacturability.

PVT: Production Validation Test

It mainly verifies the stability and consistency of various functions of new products, as well as manufacturing capability verification. The purpose of trial production is to do a lot of pre-production manufacturing process verification, so a certain amount of products must be produced, and all production procedures must comply with the standard procedures of the manufacturing plant. Generally, the new products developed are produced for the suppliers who conduct the PVT (Production Validation Test) stage trial production for them. If the situation is smooth, the new product will be trial-produced once in each verification stage. The derived new product can skip EVT (Engineering Validation Test) or DVT (Design Validation Test) according to the actual situation. There will be more than two trial productions in each verification stage.

The role of NPI in the three stages of validation

In the trial production stage, the NPI (New Product Introduction) team must work hard to find and eliminate problems, so as not to bring design problems and process problems to mass production, and SMT processing should timely feedback on the problems in the manufacturing process to the R&D team so that continuous improvement and perfect DFM design.

LKKER SCM emphasizes more detailed design when the product is first designed and solves problems that may occur in the manufacturing and testing process in advance to the design stage. 

NPI (New Product Introduction) must integrate all the supply chain resources, and coordinate the trial production, production scheduling, and follow-up of the trial production process. Most of the trial production schedules are very urgent. Generally speaking, if the whole product is produced, it will be completed in one week or less.

Learn More: 

LKKER SCM NPI Project Management Service

LKKER SCM DFM (Design For Manufacturing) Service

LKKER SCM Turnkey Design Service

What mechanical design service a design company can provide?

What mechanical design service a design company can provide

With the development of the product design industry, the demand for mechanical design is also increasing, so in this blog, we will disclose to you what mechanical design service a design company can provide. 1. Learn about product positioning  The design company is involved in many fields such as consumer electronics, handheld terminals, home appliances, …

With the development of the product design industry, the demand for mechanical design is also increasing, so in this blog, we will disclose to you what mechanical design service a design company can provide.

1. Learn about product positioning 

The design company is involved in many fields such as consumer electronics, handheld terminals, home appliances, and medical equipment, and can provide in-place services to various types of customers. First of all, we will collect information on the design concept provided by the customer. After carefully understanding the customer’s design intention, style, and requirements, we will have a comprehensive understanding of the entire mechanical design.

2. Conduct Market Research

The company will conduct market research, the main purpose of which is to let customers understand the needs and ideas of users, so as to improve the design concept and use this as the basic information for mechanical design.

3. Start Mechanical Design

During the mechanical design, through multiple analysis processes such as disassembly analysis and process analysis, the mechanical design is initially completed. On this basis, several mechanical modifications will be carried out to achieve customer satisfaction standards. It is worth knowing that mechanical design has made breakthroughs in many technical aspects, such as waterproof, drop-proof, and dust-proof, as well as automation, which can meet the various personalized needs of customers.

In addition to the mechanical design process, what skills do mechanical designers need to master?

1. Constantly disassembling

When the product mechanical designer gets a product appearance, how to carry out mechanical design? That is the constant disassembly installation. The industrial product mechanical designer should be very familiar with the performance, characteristics, and assembly of the product itself, disassemble the product in your hands, and install it again. But to restore it to exactly the same as it was before you took it apart. If you can’t guarantee this, you can take a photo of each step before disassembling the product. Knowing the product attributes, the mechanical designer should start the mechanical design.

2. Clear about every part

Every product part has its color and craftsmanship. The mechanical designer needs to understand the properties of parts. For example, know what is a plastic part, what is a PET mask, and what is an acrylic mask. To understand these names, be familiar with related materials, molds, and surface treatment processes;

3. Solid knowledge of mechanical design

Proficiency in product assembly design skills; that is, assembly-oriented design; commonly used assembly design guidelines include reducing the number of parts, simplifying product structure, standardizing parts, modularizing products, designing stable bases, designing guiding features, and positioning parts first and then specific, error-proof design, ergonomic design, etc. Master the knowledge of tolerance analysis, and be able to use tolerance analysis to optimize product design quality and solve specific problems encountered in product development;

The mechanical designer at LKKER SCM will

1. Participate in the the feasibility study of product, and participate in the product turnkey design.

2. Formulate mechanical design plans and project plans, research and develop new mechanical design and new technologies, and improve product performance and quality;

Mechanical designers need to work for a long time to expand their knowledge and accumulate experience to be able to make good products. In the process of learning and dismantling, they must learn to think and learn Learn the excellent mechanical design of others, and understand why others design it this way? If you understand it, you can design it yourself. If you don’t understand the product design, there are a lot of design problems.

A good mechanical design product requires not only the shape of a good design concept but also the support of design skillset and technology. LKKER SCM Mechanical Design Service can provide customers with professional services from all aspects and help customers transform concepts into products. 

Learn more:

LKKER SCM Turnkey Design Service

LKKER SCM NPI Project Management Service

LKKER SCM Transfer To Volume Manufacturing Service 


What are the tips or rules for product mechanical design?

What are the tips or rules for product mechanical design?

In product mechanical design, there are still many experiences and methods, which are summed up by LKKERSCM mechanical designers and mechanical engineers. These experiences and skills cannot be learned in books. In this blog we disclose the tips or rules for product mechanical design. About the selection of materials to be considered: 1. The use …

In product mechanical design, there are still many experiences and methods, which are summed up by LKKERSCM mechanical designers and mechanical engineers. These experiences and skills cannot be learned in books. In this blog we disclose the tips or rules for product mechanical design.

About the selection of materials to be considered:

1. The use environment of plastic products, such as temperature resistance, cold resistance, food hygiene, wear resistance, etc.;

2. The physical and mechanical properties of plastics, such as strength, rigidity, toughness, elasticity, water absorption, and sensitivity to stress;

3. Plastic molding process, such as fluidity, crystallization rate, sensitivity to molding temperature, pressure, etc.;

4. The shrinkage and deformation of plastic products after molding.

About product shape

It can meet the use requirements, which can adapt to efficient cooling and hardening (thermoplastic products) or rapid heat curing (thermosetting plastic products).

About mold making

Its overall structure should be considered, and the requirements of simplifying the mold should be achieved as far as possible, especially the complexity of core pulling and ejecting products. At the same time, the shape of the mold parts and their manufacturing process should be fully considered in order to make the product more economical.

About cost

It is necessary to consider the raw material price, injection capacity, service life, and replacement period of injection products to reduce costs as much as possible.

In addition, during the mechanical design, we also need to consider the thickness of plastic parts, stiffener design, boss shape and size, rounded corner design, and Screw design.

Learn More: 

LKKERSCM Mechanical Design Service 

Why does outsourcing product development project make sense?

Why does outsourcing product development project make sense

It is expected that contract product development will become a major outsourcing trend in the next 10 years. The basis of this model is that technical talents can be introduced according to different cost expenditure changes, allowing startups to focus on its core expertise and business development. If a company decides to use an outsourcing …

It is expected that contract product development will become a major outsourcing trend in the next 10 years. The basis of this model is that technical talents can be introduced according to different cost expenditure changes, allowing startups to focus on its core expertise and business development. If a company decides to use an outsourcing model to develop a product, it may benefit a lot.

Avoid expensive in-house engineering technologists

As a startup, managing funds efficiently is a major issue. Doing product development in-house means you have to hire, train, and pay highly-skilled people like engineers.

What if you could get professional advice based on your needs?

Outsourcing product development projects allow startups to have a full-fledged talent pool of specialists that the company finance can afford in the pre-deployment phase. It gives startups more flexibility to proceed gradually. When the company develops to different milestones, the introduction and exits of professional and technical talents are determined according to the actual time needs.

Do small-scale production

Select a comprehensive partner for product development and small-scale production. When the time comes for mass production in a few years, the transition will be seamless. A good contract developer will help startups identify scale manufacturers and ensure smooth technological transitions of the manufacturing process.

Maintain control of the intellectual property

When some contracted product development companies cooperate with startups, they will hope to obtain some intellectual property (IP).

When choosing a product development partner, it is important to know who will own the intellectual property. The intellectual property that some other design or engineering firm intends or wants to own may be at the core of the development or more peripheral. Giving everything to customers will gain a lot of trusts that the contracted product development companies would not try to compete with the customers.

If you’ve decided to outsource certain product development projects, how do you decide which processes to outsource and which partners to use?

The Product Development Outsourcing Map

The Product Development Outsourcing Map can help you choose the right resources for your team, a tool that evaluates your options based on both strategic and technical dimensions.

3. High Technical Difficulties Find freelancer through platform

1. Collab with product development partners

2. Collab with product development expert

3. Set up the joint venture with Product Development stakeholders

Internal development team
2. Medium Technical Difficulties Find freelancers through platforms

1. Outsourced development companies

2. Collab with product development partners

3. Collab with product development expert

4. Set up the joint venture with product development stakeholders

1. Internal development team

2. Collab with product development partners

3. Collab with product development expert

4. Set up the joint venture with Product Development stakeholders

5. Remote development service

1. Low technical difficulty /

1. Outsourced development companies

2. Collab with product development partners

3. Set up the joint venture with product development stakeholders

Remote development service
  1 – Low strategic importance  2 – Medium strategic importance  3 – High strategic importance 


Regarding strategic importance, here’s are three questions to consider:

Is this product development a key company strategy?

Will the product development project become highly relevant to the company’s subsequent development?

Is the product development project an important part of product differentiation?

Regarding technical difficulty, here’s are three questions to consider:

Is it technically complex and does it use cutting-edge components?

Does it rely on internal patents or deep company know-how?

Do you want to capture IP for future use?

While it’s impossible to reduce this complex decision to a set of black-and-white rules, the outsourcing maps will help you make a quicker decision.

At the same time, you should also consider factors such as internal culture, intellectual property sensitivity, cost, and prior experience.

If you’re new to outsourcing or remote development, there are a number of issues that affect the quality of resources you consider, including communication issues and resource turnover issues, and an outsourcing map will help minimize these risks.

When you hire a design firm, they will probably charge you a high cost. To achieve a successful product development process, you must move beyond your comfort zone and keep learning, don’t ignore this valuable opportunity to develop new skills and challenge your fears.

Learn More: 

LKKERSCM Turnkey Design

LKKERSCM NPI Project Management 

LKKERSCM Transfer To High Volume Manufacturing

Mechanical Design of Plastic Parts: Split Line

Mechanical Design of Plastic Parts

The meaning of the split line It is commonly found in a narrow and shallow slot and designed for mechanical function, process needs, or decorative effects on plastic products, sometimes it is called a “cosmetic line” or “decoration line”. Why do you need a split line design? What does the split line do?  1. Mechanical …

The meaning of the split line

It is commonly found in a narrow and shallow slot and designed for mechanical function, process needs, or decorative effects on plastic products, sometimes it is called a “cosmetic line” or “decoration line”.

Why do you need a split line design? What does the split line do? 

1. Mechanical function:

1) Uniform gap: When the upper and lower shells of the product are assembled, avoid the defect of uneven appearance gap due to the large outline or deformation of the shell edge during the injection molding process. The split line here provides a gap to visually reduce the unevenness, and the larger the split line gap width, the less noticeable this unevenness is.

2) Reduce the scratching feel: When the upper and lower shells of the product are assembled, the degree of appearance scratching caused by the excessive assembly step difference caused by the deformation of the shell during the injection molding process is reduced.

Especially when the parting surface is a curved surface, the dimensional accuracy of the shape is more difficult to control. If the appearance allows, the addition of split lines can reduce the requirements for mold accuracy.

Why can the split line reduce the scratching feel?

This is because the gap provided by the split line increases the included angle α of the contact between the finger and the sharp corner of the casing, and the horizontal component force of the sharp corner of the casing on the finger decreases with the increase of α. If the contact area remains the same, the pressure on the fingers will become smaller, so the scratching feel will be reduced.

In addition, rounded corner designs are often used in the design, which actually increases the contact area between the finger and the contact body, thereby reducing the pressure on the finger. It can also reduce the scratching feel, and the rounded corner design is used in the following figure.

2. Process needs:

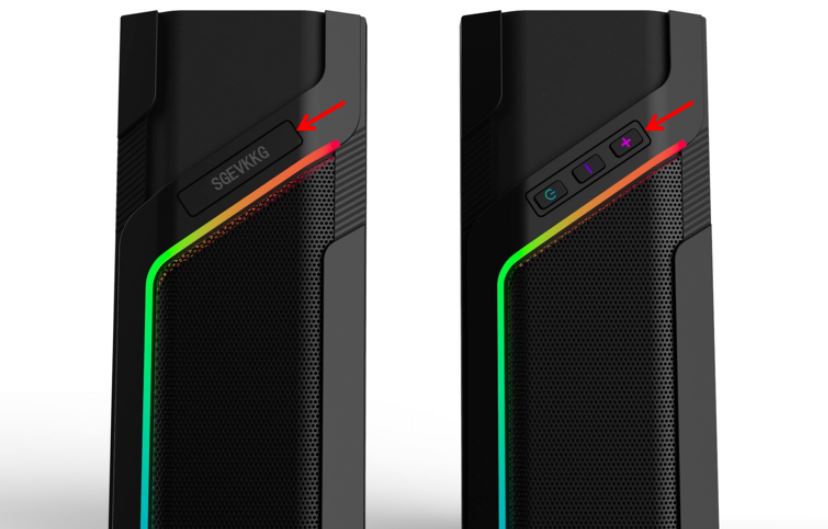
1) Prevent overspray: When the same appearance surface needs to be sprayed with different colors, the design split line separates the two connected surfaces, which is convenient for making a fixture and spraying paints of different colors to prevent the paints of different colors from flying to the other side. At the same time, the possible oil accumulation can be stored in the art groove, so that it looks like a straight line in appearance.

If the split line is not designed, since it is difficult for the jig to fit seamlessly at the color interface (the jig requires high precision), the paint will splash a little or penetrate to the other side, resulting in the dividing line between the two colors. It does not look straight and clear but presents a zigzag-like dividing line, and it is also possible for oil to accumulate at the dividing line.

2) Cover the parting line: When the appearance of the product is placed on the mold, the split line can be designed at the position of the parting line, and the unsightly line position can be hidden in the split line.

When the appearance of the product has inserts on the mold, the split line can be designed at the position of the insert line, and the unsightly insert line can be hidden in the split line. (It is common in the face frame LOGO of some ODM manufacturers. Different brands only replace the insert here, or the two plastic parts have the same structure except for the insert. This approach can avoid re-opening the mold)

3. Decorative effect:

1) Designing split lines on some large surface area in order not to appear rigid, increasing the layering of the product, and strengthening the visual effect, is a design based on aesthetics.

2) Split line is also widely used for functional requirements, such as hand-held product design split line for anti-skid, battery cover product design raised split line for push cover, etc.

Classification of split lines

1. Structural / Mechanical split line

Since this type of split line is designed at the die joint of the two parts that cooperate with each other, it is also called the die joint split line, and this is also the position of the lip, so it is also called the lip split line. The die joint split line is theoretically unnecessary, but in fact, due to the insufficient machining accuracy of the mold, the deformation of the plastic shell, and the dislocation of the assembly, an unavoidable step difference is formed. At this time, a split line has to be designed to remedy the appearance.

There are mainly the following products that need to design split lines on the die joint:
1) The product has a large external dimension, and it is difficult to control the external dimension tolerance within a reasonable range in terms of product structure and mold. In order to reduce the obvious difference between the upper and lower shells, the die joint split line should be designed;
2) The structural strength of the product is not enough, and it is easy to deform, which makes it difficult to control the step difference of the die joint during assembly. In order to prevent serious scratching, the die joint split line should be designed;
3) The processing level of the mold factory is not high, and the mold production is not precise enough. The die joint split line is designed when the appearance allows, which can prevent defects such as step difference and uneven gaps caused by mold processing problems.

2. Process split line:

1) Oil spray split line: The surface of the product is sprayed with two colors of paint, which is used to separate the oil separation tank of the two paints, and the jig mask is used to meet the technological requirements of two-color spraying. The oil distribution tank is often designed as a concave structure, and the size is designed according to the accuracy and spraying requirements of the shell and fixture. If the accuracy of the shell and fixture is high, the split line can be appropriately made smaller. Generally, the shell is often designed according to the spraying requirements. 

2) Mold process split line: Avoid the process grooves such as flashes or slider lines that affect the appearance of the mold parting. It is mainly used in mold slides and replaceable inserts because it is difficult to save the mold in these positions to make it seamless. When the product is injection molded, capes or clip lines are generally generated at these positions, such as the design of split lines at these positions. These flaws can be hidden.

3. Decorative split line:

The decorative split line is often used to beautify and embellish the product shape, generally making a concave groove, and its size, shape, and distribution are generally related to the appearance and details of the entire product.  

Split line design considerations

1. After designing the split line between the upper and lower shells, it is difficult to completely solve the problem of the difference between the upper and lower shells. Therefore, there will be two situations: the surface scraping and the bottom scraping. In the design, the surface scraping is generally used, so that the outer shell size is larger than that of the bottom shell. 0.1~0.15.

2. When designing the split line, the width of the groove is designed to be wide, and the shallower the depth, the easier it is to process the mold. Therefore, if the appearance allows, the width of the groove should be designed as wide as possible and the depth is shallower.

3. The groove section of the split line should not be designed as a rectangle as much as possible, because the bottom surface of the rectangular groove is easy to form dead corners and easy to accumulate dust. The bottom surface of the rectangle should be rounded to facilitate dust removal.

Learn More:

LKKER SCM Mechanical Design Service

LKKER SCM Mold Making Service

LKKER SCM Design For Manufacturing (DFM) Service

How to control the cost when designing the product structure or mechanism?

How to control the cost when designing the product structure or mechanism

Cost is the core part of a product. The level of cost determines the company’s profit to a large extent. Cost control starts from the beginning of product design. 1. When selecting materials, on the premise of satisfying the function, try to use materials with low prices 2. When modeling the product shape, on the …

Cost is the core part of a product. The level of cost determines the company’s profit to a large extent. Cost control starts from the beginning of product design.

1. When selecting materials, on the premise of satisfying the function, try to use materials with low prices

2. When modeling the product shape, on the premise of satisfying the appearance, try to reduce the number of parts as much as possible

3. When designing the product structure, try to simplify the mold to save the cost of the mold

4. When designing the product structure, select the appropriate fixing method to save the cost of production and assembly

5. When surface treatment of products, according to product positioning and appearance requirements, adopt appropriate surface treatment methods to save processing costs

6. In the selection of suppliers, choose manufacturers with strong technical expertise, good communication and cooperation, and the best price. The supplier’s strong technical expertise can avoid the repeated modification and waste of time caused by errors in the production of parts, and the Communication and cooperation are easy to communicate and facilitate the work, which can also save costs.

7. Effectively control the development progress of new products, shorten the project time as much as possible, save time and save production cost. If the project time is prolonged, it will not only delay the delivery time but also compensate for liquidated damages, which are not worth the loss.

8. When designing the product structure, if the company has stock materials, the stock materials should be selected as much as possible. The stock materials are left over from the company’s previous production. If they are not used, it will cause waste. Reus ing These inventory items for production is also a way to reduce costs.

Learn More

LKKERSCM Mechanical Design Service

LKKERSCM Turnkey Design Service

Mechanical Design Buckles Design Standard

Mechanical Design Buckles Design Standard

Buckles introduction The buckle position mainly refers to the buckle position of the upper shell and the lower shell. When considering the number and position of the buckle, it should be considered from the overall and external dimensions of the product. It is required to have an average number and a balanced position. The buckle …

Buckles introduction

The buckle position mainly refers to the buckle position of the upper shell and the lower shell. When considering the number and position of the buckle, it should be considered from the overall and external dimensions of the product. It is required to have an average number and a balanced position. The buckle located at the corner should be as close to the corner as possible to ensure better fitting at the corner. Seam problems are prone to occur at corners.

Classification of two buckles

Two classifications of deduction

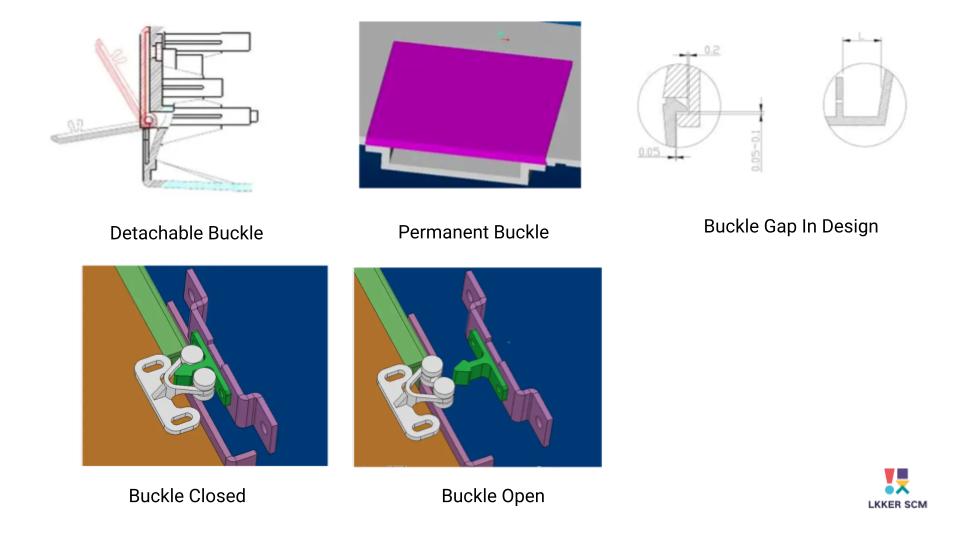
(1) Detachable type

(2) Permanent

Generally, the buckles we commonly use are “removable”. The design of the permanent buckle is easy to install but not easy to remove, and the design of the detachable buckle is very convenient to install and remove. The principle is that the hook-shaped protruding part of the detachable buckle has appropriate lead-in and lead-out angles to facilitate the action of buckle and separation. The size of the lead-in and lead-out angles directly affects the force required for buckle and separation. The permanent buckle has only lead-in corners and no lead-out corners, so once it is buckled, the connected parts are in a self-locking state, and it is not easy to remove.

Four buckle design considerations

The buckle is the easiest, fastest, lowest cost, and most environmentally friendly way to assemble plastic parts. There is no need to use auxiliary tools such as screwdrivers during buckle assembly, and the assembly process is simple, and the assembly of two or more parts can be completed with a simple insertion action. Before designing the buckle, it is necessary to understand the following important factors: the mechanical properties of the plastic material used; the number of times of assembly and disassembly; the stress that the buckle can withstand during the assembly process, and the mechanical pressure acting on the buckle after assembly.

1. The size of the buckle, the size of the buckle needs to ensure that the buckle has sufficient strength and elasticity so that the buckle has sufficient strength and elasticity so that the buckle will not break and fail during the assembly or disassembly process, so the reasonable size of the buckle is very important. The thickness and height of the buckle are the main factors that determine the strength and elasticity of the buckle. If the thickness of the buckle is too small, the strength is weak, and the buckle cannot withstand large resistance; if the thickness of the buckle is too large, the buckle is not elastic, and it will break due to insufficient offset during the assembly process. Plastic walls are prone to shrinkage defects.

Different plastic materials have different dimensions of the buckle due to their different elastic modulus and other parameters. The required buckle size can be calculated by the relevant formula. Of course, the best way is to verify whether the size design of the buckle meets the stress requirements through finite element analysis.

2. Add rounded corners at the root of the buckle to avoid stress concentration. The most common failure mode of the buckle is due to the sharp connection between the root of the buckle and the wall of the part, which leads to the concentration of stress at the root of the buckle so that it breaks during the assembly or disassembly process. Some buckles need to avoid sharp corners at the root, and at least ensure rounded corners half the thickness of the buckle.

3. The buckles are evenly distributed if the two parts are matched by the buckles, the buckles need to be evenly arranged around the parts to bear the load evenly. If the part is prone to deformation, consider placing the buckles close to places where the part is prone to deformation, such as the corners of the part.

4. Use the positioning column to assist the assembly of parts and ensure the dimensional accuracy of the assembly. If the parts are completely matched by buckles, it is difficult to ensure the assembly accuracy requirements between the parts due to the low dimensional accuracy of the buckles. This is the disadvantage of buckle-fit. At this time, the positioning column and positioning hole can be added to ensure the assembly size between the parts and improve the assembly accuracy. There are two other benefits of using locating posts and locating holes. First, during the assembly process of the two parts, the positioning column and the positioning hole of the appropriate height are first in contact with the buckle assembly feature (that is, the height of the positioning column on the plastic part is higher than the height of the buckle), which can be the assembly process of the parts provides guidance and improves the assembly efficiency. At this time, the role of the positioning column plays a guiding role; secondly, the use of the positioning column can effectively avoid the buckle damage caused by the rough assembly action.

5. The buckle design avoids increasing the complexity of the mold. The unreasonable buckle design can easily increase the complexity of the injection mold, and the parts need a lateral core-pulling mechanism, which increases the cost of the mold. Proper buckle design optimization can simplify the mold structure. The undercut can be avoided in the main part of the buckle, and the injection mold does not need a lateral core pulling mechanism.

6. The buckle design needs to consider the convenience of mold modification. The buckle design generally requires multiple design modifications (including modifying the length, thickness, offset, etc. of the buckle) to meet the assembly requirements of the parts. The design size can be slightly smaller, instead of making the size of the buckle enough at one time, it is convenient for subsequent mold modification.

Learn More

LKKER SCM Mechanical Design Service

LKKER SCM Mold Making Service

LKKER SCM Design For Manufacturing (DFM) Service